"Why are we talking about her birthday right now?" my husband inquired. "It's June."
"Because I want to make this birthday extra-special, and for that I will need time."
Minnow has experienced a lot of change since we moved from Bronxville in April: Potty training, moving to a new house, transitioning to a twin bed, welcoming a baby sister, starting a four-day-a-week nursery school program. If anyone deserves the birthday party of her dreams, it's Minnow.
Since moving into the new house, Minnow has become engrossed in all things Disney. This, of course, is all my fault. In Bronxville the only show Minnow was allowed to watch was Sesame Street. Now that Peanut has joined the party, Minnow has been watching more television, usually at the end of the day when my answers to the endless barrage of toddler inquiries come out all garbled and incoherent. Disney is my reprieve.
I think toddlers are born programmed to recognize and idolize Mickey Mouse. Within minutes of the first time she saw Mickey Mouse Clubhouse, Minnow was referring to all of the characters by name and doing the "Hot Dog Dance." It should have come as no surprise to me, then, that when I asked Minnow what kind of party she wanted for her third birthday, she answered:
"MICKEY MOUSE CLUBHOUSE!"
Specifically, Minnow asked that I "turn our house into the Mickey Mouse Clubhouse." After three months of turning our house into a livable home, I wasn't sure I was up to the challenge, but I did my best to capture the essence of the show for her dream party.
Invitations
The first step was to create a festive invitation to set the tone for the party. After googling images of Mickey Mouse party invitations, I came up with the concept of doing a folded card that when unfolded resembled the iconic Mickey Mouse ears. I bought an inexpensive pack of folded cards made from black card stock with matching envelopes from the craft store.

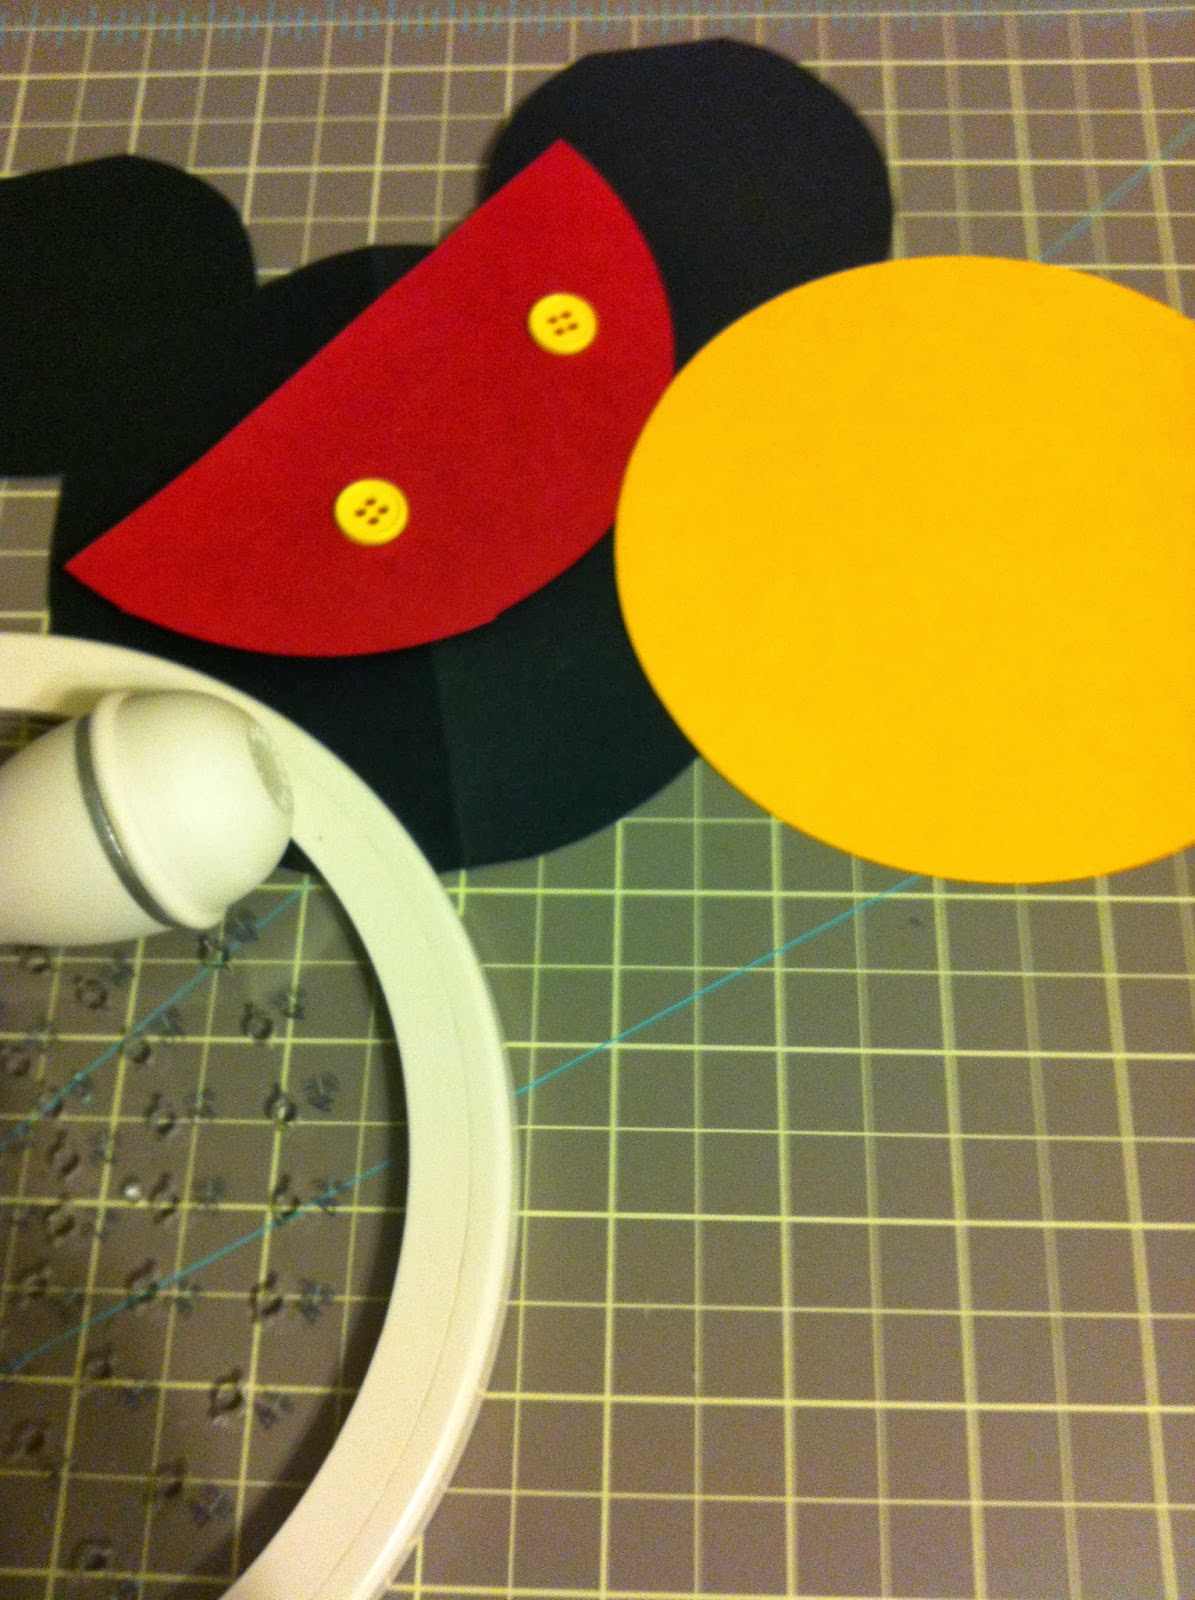
Using a circle cutter, I created a template by tracing one large circle for the face and two smaller circles for the ears onto an unfolded card. It took some trial and error to get the size of the head and ears just right; it's a good thing I had plenty of extra cards!

Using the template I created, I traced the Mickey Mouse image onto unfolded cards, then refolded them to cut out the shape.

I used the circle cutter to cut out similarly-sized circles from red and yellow card stock. The red circles were cut in half to create Mickey's "pants," on which I glued two yellow buttons. I wrote the details for the party on the yellow circles and glued them to the insides of the cards.
I hand wrote the invitations using colored fine-tip Sharpie markers. The tag line read, "If you've got ears, say CHEERS!"

When the invitations were completely dry I refolded them so they would fit into their corresponding envelopes. Using all this card stock made the invitations quite heavy, and they required extra postage to mail. If I were doing this again, I'd probably use colored construction paper, rather than card stock, for the red pants and yellow interior.
Decorations
I created a birthday banner using the same Mickey Mouse head template I used to make the invitations. I stenciled letters onto blue, green, and yellow card stock (the same colors as the Mickey Mouse Clubhouse sign on the show), cut them out, and glued them onto the Mickey Mouse heads. I punched a hole in the center of each head and linked the banner together with red and white polka dot grosgrain ribbon. In retrospect, I think I would have punched a hole in each ear instead; the sign would have laid better. Even so, the banner turned out super-cute.

We strung the banner across the back window in our dining room. It was the perfect backdrop for the food table, which was flanked on either side by bunches of balloons in the same Mickey Mouse Clubhouse color scheme.

Food
Minnow's birthday party started at 3 p.m., between lunch and dinner times, so rather than serve a meal I decided to serve finger foods, which are easier for three-year-olds, anyway. For a thirty-year-old woman, I had way too much fun planning the Disney-themed snacks. On the menu were:
Meeska Mooska Mickey Meatballs (Swedish meatballs served with Mickey Mouse picks)
Minnie's Fa-mouse Macaroni and Cheese (Baked macaroni and cheese that I served in individual red paper cups)
Goofy's Hot-diggity Dogs (Cocktail weiners)
Donald and Daisy's Cheese and "Quackers"
Pluto's Favorite Dog Biscuits (Sugar cookies shaped like dog bones)
Chip N' Dale's Chick N' Nuggets
Clarabelle's Chocolate Milk (Horizon Organic chocolate milk boxes)
And a vegetable tray to make me feel a little less guilty about serving all this junk food to children.

The real star of the party, besides Minnow, of course, was the Mickey Mouse Clubhouse Cake, which I had custom made by A Cake In Time bakery located in Mt. Sinai, NY.

The baker, Sherry, created the Mickey Mouse Clubhouse using carved Rice Krispies treats covered in molding chocolate. When Sherry delivered the cake, Minnow squealed with delight and spun around in circles. That reaction was totally worth the price, which was in the ballpark of more than our wedding cake. ("But, hey, I made the invitations and the favors," I reminded my husband.) It killed us to cut into this masterpiece after singing Happy Birthday, but the delicious layers of buttermilk vanilla and sour cream chocolate cake with Oreo cookie buttercream made destroying it slightly less painful.
Music
The playlist for the party included some of Minnow's favorite artists, including Adele and Dawes, as well as perennial party favorites like "It's Your Birthday" by Justin Roberts, "Birthday" by the Beatles, as well as "Hot Dog" by They Might Be Giants.
Favors
Originally I wanted to make Mickey Mouse party hats for the kids by pasting a pair of black ears onto red party hats, but, amazingly, I couldn't find plain red party hats at the party store. I did, however, find these plush Mickey Mouse ear headbands for $2.99 each, which were even more fun for the kids (and some of the adults. I'm looking at you, Pop Pop).
For the favors I glued two yellow buttons onto the front of red paper sacks and attached white Mickey hand party tags that I drew free hand and personalized with black letter stickers. Inside the sacks were crayons, notepads, playing cards, and bubbles, but no candy because I'm normally a stickler about limiting sugar for children. (Which is probably another reason why Minnow went bonkers for her cake.)

Minnow says, "Thanks for dropping by my Mickey Mouse Clubhouse party. Oh, Toodles!"


